In May 2011, EU countries adopted the EU Cookie Law (ePrivacy Directive), which requires websites to get consent before storing cookies on users’ devices. Other jurisdictions such as California introduced similar laws. Today, ensuring user privacy and enabling cookie consent are becoming increasingly challenging tasks for marketing teams around the world.
What is a cookie anyway?
A cookie is a simple text file that is placed on a user’s device to enhance the user experience and help measure user interactions over time. Cookie files typically include unique codes that help servers identify individual users. This has many practical uses, such as shopping carts that remember your items. Cookies also help marketers gain access to valuable user engagement information.
All these new laws governing the use of cookies triggered an avalanche of cookie consent banners. These banners are everywhere now and they give users the option to accept or reject having their personal data collected. Many website visitors simply ignore cookie banners, or reject cookies. As a result, websites can no longer send the required information for marketing analytics using tools such as Google Tag Manager or custom pixels. This has a direct impact on data availability in Google Analytics. Ecommerce reports, attribution reports and many other user engagement reports will have gaps.
One potential solution is to bypass the user’s device entirely and send the relevant data from the transaction server to the analytics server. For example, if a user just filled a reservation form, the server that processes the form can send this user engagement event directly to a server side GTM container, or to another server. Meta’s Conversions API is exactly this: a dedicated server that is ready to receive the relevant user engagement information. As Meta’s Conversions API receives the data directly from the transaction server, the end user’s cookie consent will not limit gathering marketing analytics data. Of course, we still need to follow all the best practices to protect user privacy and confidentiality during this transmission.
Setting up Meta’s Conversions API
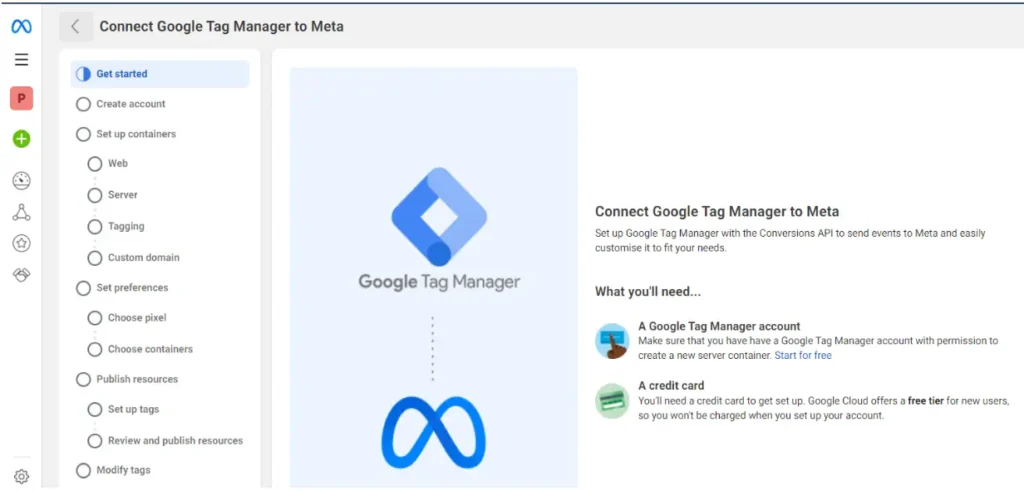
In this section, we will explain how to set up Meta’s Conversions API using a server side GTM container and Google Cloud.
1. Create a server side GTM container and provision of tagging server.
If you already have a client side GTM container, go to “admin”, click on the “+” sign, and create a new server side container.
If you already have a Google Cloud Platform (GCP) account, you can choose the “manually provision tagging server” option. Otherwise, you can select the automatic provision option to create a billing account. After you add your billing info, connect that billing account to your server side GTM container.
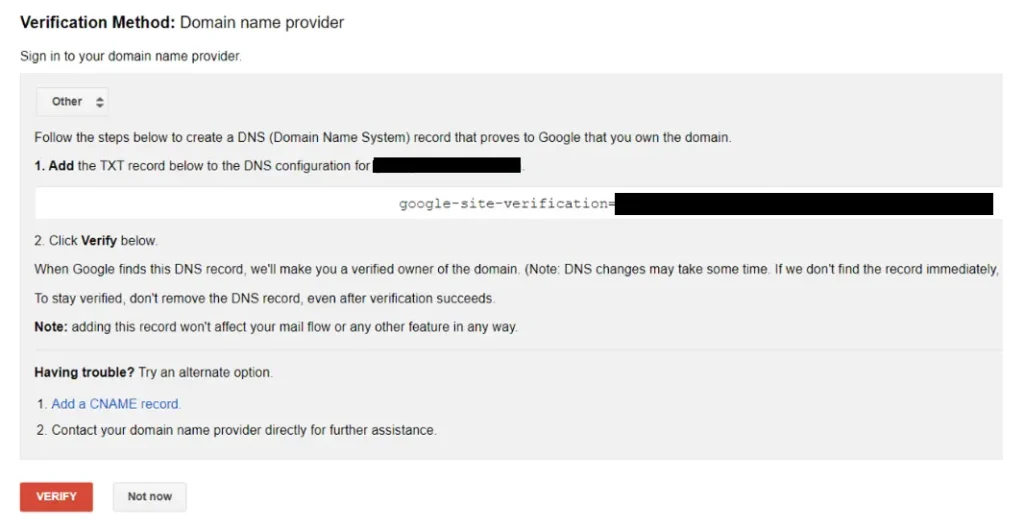
2. Configure A DNS server
The GTM server side container is hosted on GCP, and GCP has a server URL, which by default does not contain your website domain. As the user’s browser will not send cookie info to an URL that is different from your website domain, you need to create a subdomain, and map that custom domain, so that you can use the cookie information from incoming requests.
Add your custom domain in GCP’s App Engine settings, and verify your domain in GCP. You will also need to login to your DNS record manager account to add a new DNS record during the verification process.
3. Configure Server Side GTM and Client Side GTM containers
- Inside the server side GTM container:
In GTM “Tags” section, create a tag as shown below:
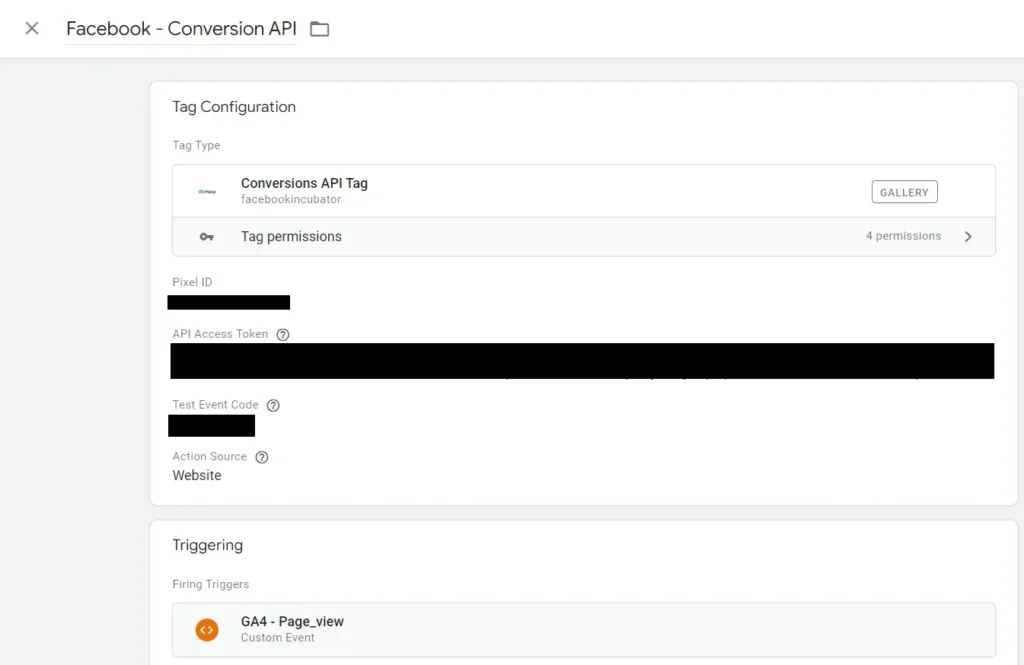
You can find the tag type “Conversions API Tag” in the GTM templates gallery. The Pixel ID, API Access Token and Test Event Code can be found in Meta’s Events Manager as shown below.
In GTM’s “Clients” section, create a new client like as shown below:

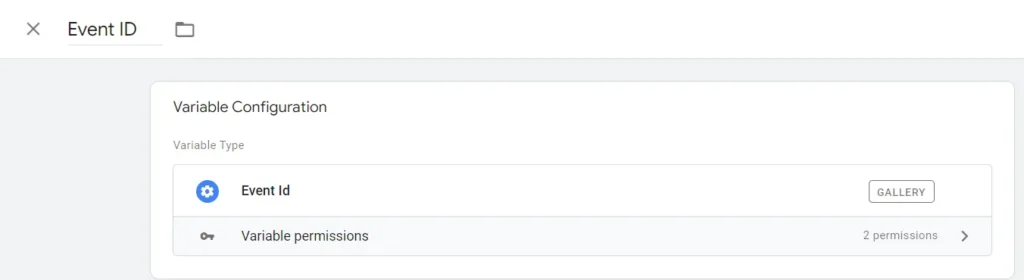
2. Inside the client side GTM container:
Create a new variable called “Event ID”. Meta Ads require both event name and event id to deduplicate identical events. Without the event id variable, events may be double counted if Meta Ads receives data from both web browser and the Conversions API.
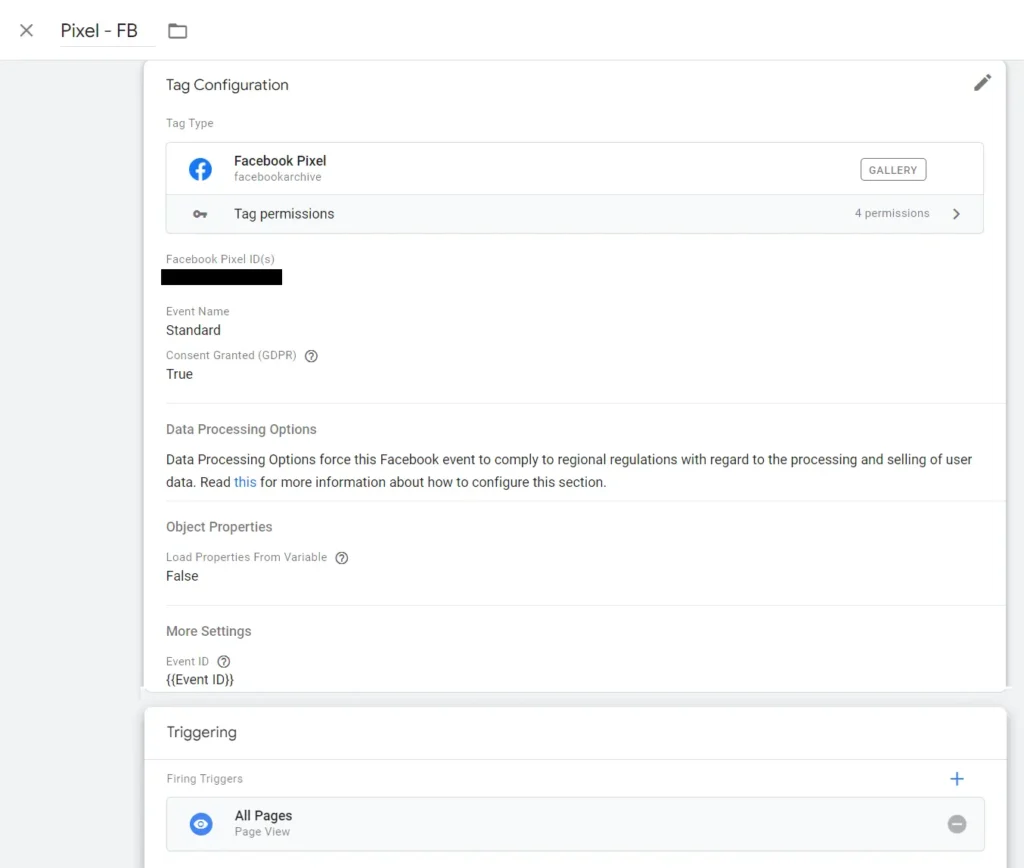
Add/update your Facebook pixel tag to include the event id:
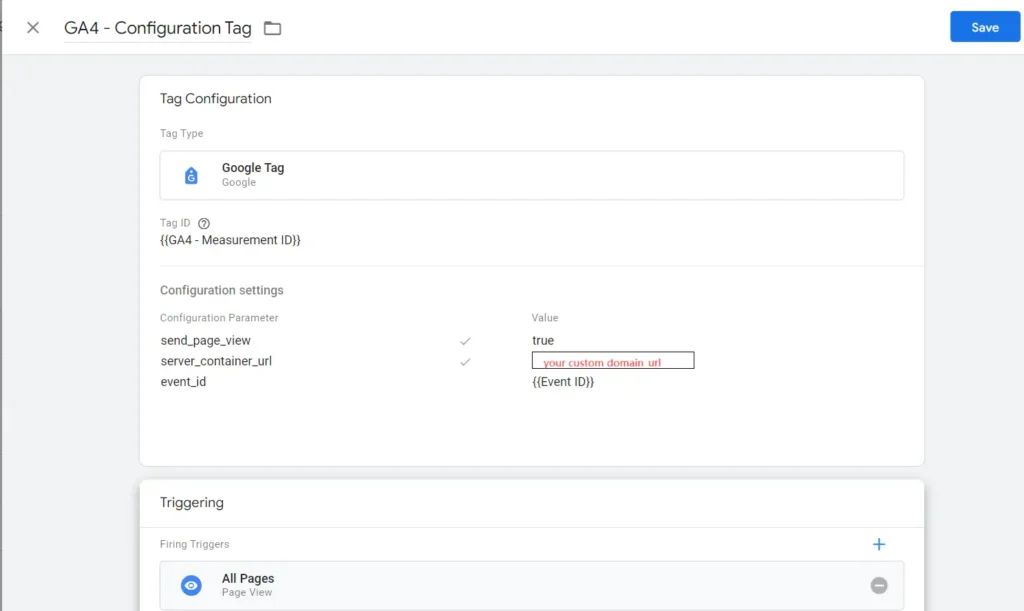
Update your GA4 configuration tag to include two more parameters: “server_conatiner_url” and “event_id”. The value of server_conatiner_url is the server side container URL, the same one you created in step 1 and use it to replace the default server url in GCP.
After publishing your changes in both GTM containers, go to the preview section of your server side GTM container, load the website and see if you can find the pageview events you just created. You won’t see the event id in preview, but you can go to Meta Ads, and find event ids in the “Test Events” section. If in Meta ads, you see the pageview event from the server, that means that the conversion API is working properly. Congratulations!
Help is on the way!
If any of the steps above seem confusing or difficult to implement, don’t worry. Our team of experts is here to help! Just get in touch with our support team support@plumfind.com and let us help you get back on track.
About the author(s):
Jingfei is our software engineer. She can magically convert our craziest ideas into well-optimized chunks of code. Her unbounded energy and can-do attitude keep our technical teams running like a well-oiled machine. We suspect that the source of her energy is the classics: she loves opera, her favorite composer is Mozart and in another life, she could have easily been an archeologist. She lives in Montreal, Canada.
Leave a Reply