
Google Analytics 4 is the premier analytics platform today and it is widely used in tracking the performance of ecommerce marketing campaigns. However, configuring GA4 for properly tracking your ecommerce transactions is easier said than done.
There are many online tutorials teaching how to set up GA4 for ecommerce tracking. However, not too many of them discuss how you can make sure that the configuration is working properly. In our experience, the most challenging part of the configuration is testing. If you used Universal Analytics before, you may know that it used to take a few minutes for ecommerce transactions to appear in GA reports. One of the biggest changes with GA4 is the amount of time you need to see the transactions in ecommerce reports. Usually, it takes 24 hours to see purchase records in GA4.
For most use cases, this wait time is very inconvenient. There are many moving parts during the testing phase, and not getting near real-time feedback from the GA4 reports can slow down the entire testing process.
So, here’s how you can speed up the testing process: use the real-time view to check for the presence of the purchase event and use the debug view to verify the transaction data.
In order to verify the purchase event, you can go to the GA4 real time report and find a list of events as well as all the events’ parameters. You should be able to see the purchase event in these reports.
For ecommerce events, we cannot verify them in the real time report, but GA4 has a very useful “DebugView” feature to check them. The DebugView is within the GA4 “admin” section. Unlike the real time report, this DebugView feature can only track a user’s behavior when you are using Google Tag Manager’s preview mode. If you run the test without using the GTM preview mode, you will only find the test events in the real time report. There will be nothing in the DebugView.
Step-by-step instructions for the DebugView
Let’s use the ecommerce “purchase” event as an example to explain how the DebugView works.
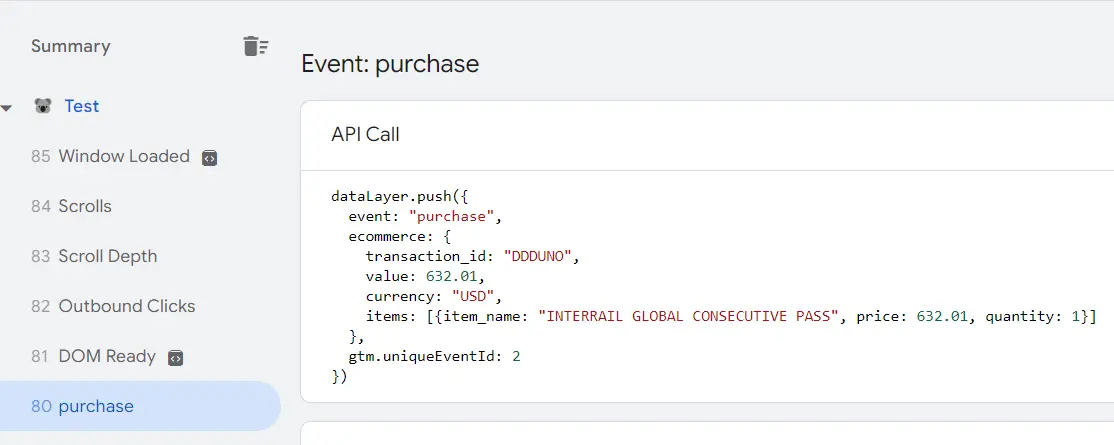
We assume that you have already added the purchase event tag in GTM. Now you are ready to run a test transaction in the GTM preview mode. In GTM, you should see a purchase dataLayer similar to the one below. This is an essential part of the ecommerce tracking implementation. For this article, we assume that this dataLayer is in place, if not, you will need to work with your developer to make sure that it is included in the transaction confirmation page. Your GTM purchase tag sends exactly the same information to GA4.
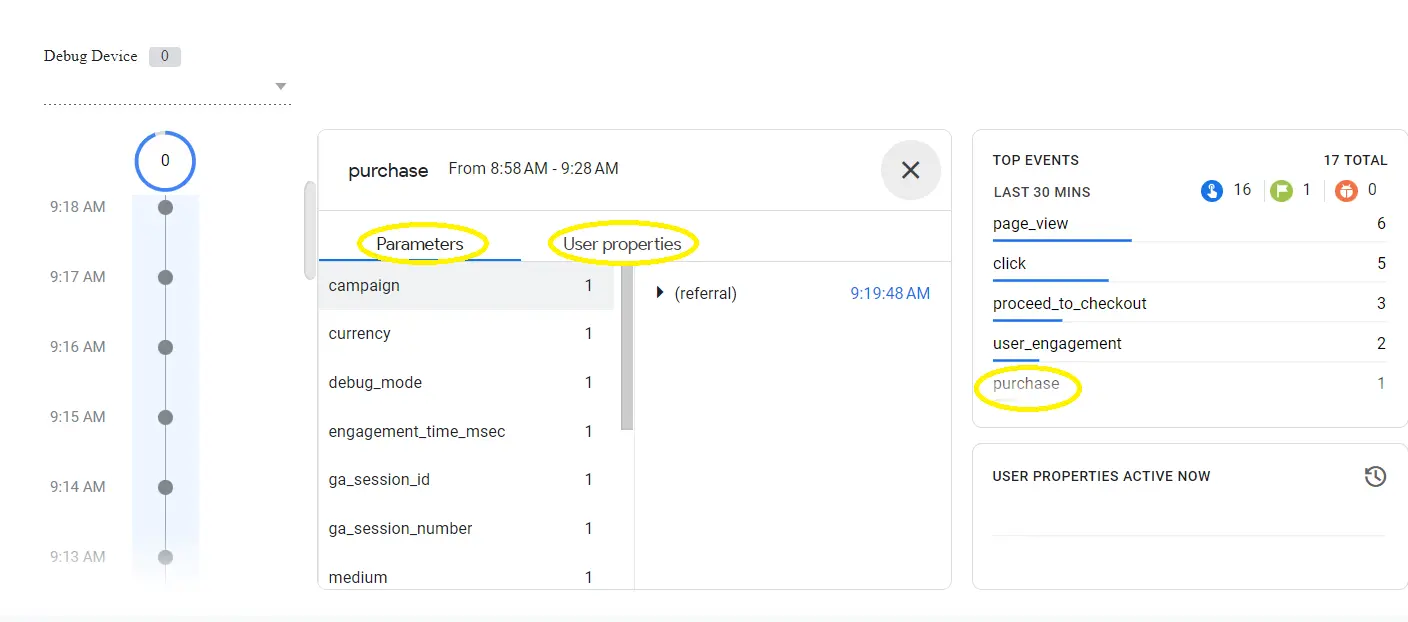
If you go to GA4 DebugView, you will find the timeline and all the events fired during your test. The “top events” section on the right side of the page is similar to the event list in the realtime report. However, in the realtime report, when you click on the purchase event, you can only find the event “parameters” and “user properties” information, you won’t find any data related to purchase items.
So where are the ecommerce transaction details hiding?
Right in the middle of the page you will find a vertical timeline, where each event is marked as an icon.
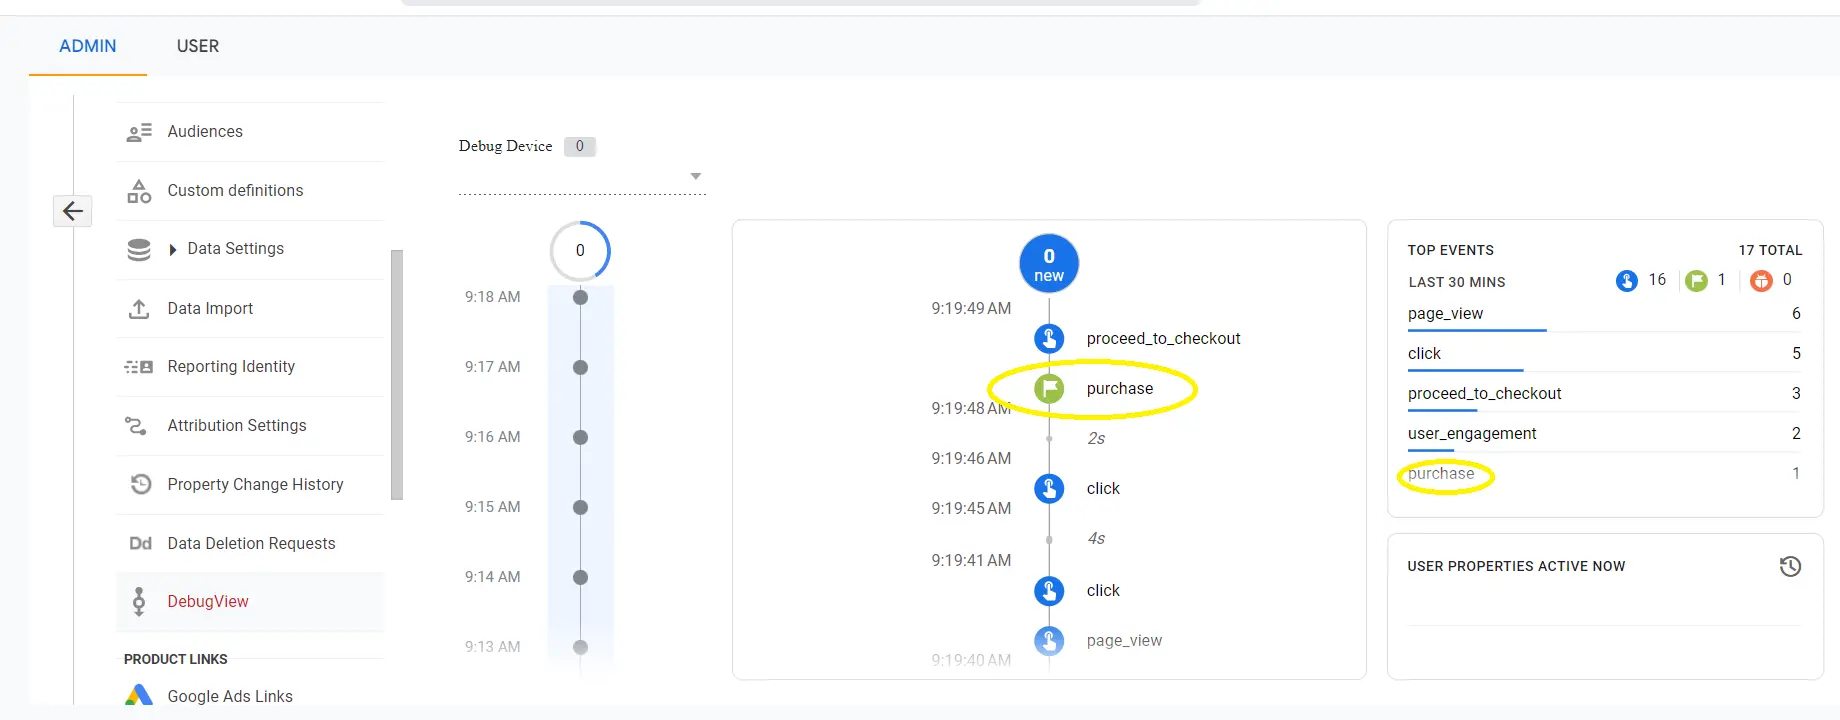
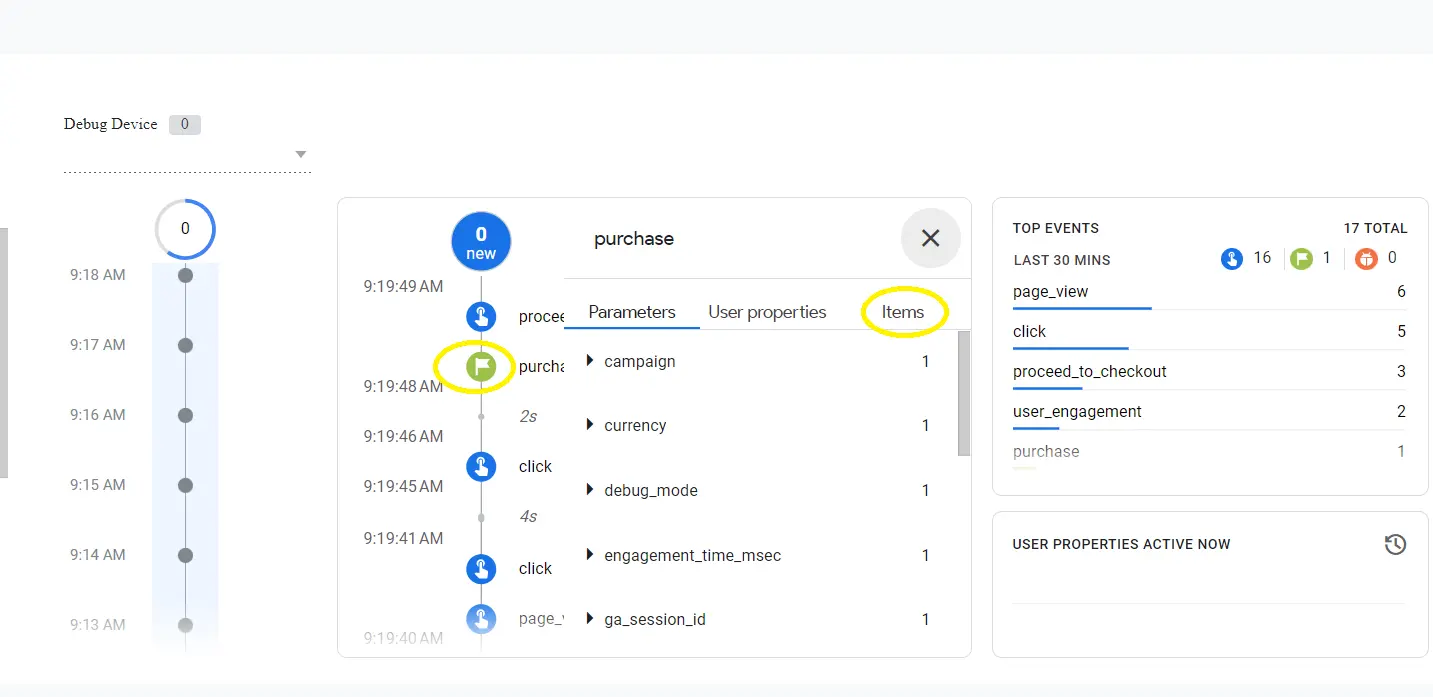
The purchase event icon is a green one. Once you click on it, you will find an extra “Items” tab, which contains all the transaction info sent by purchase event dataLayer. For example, if your purchase dataLayer contains a list of specific items, you can verify that all of these details are present in the “Items” tag in DebugView. What you see here will eventually make its way to the ecommerce reports in GA4 (with the usual 24 hour delay). Using this method, you don’t have to wait until the next day to complete your tests.
However, there is a pitfall to avoid: the transaction_id within your purchase dataLayer must be unique! If there are multiple transactions using the exact same transaction_id (e.g. , caused by reloading the page or another issue), then GA4 will only record the first purchase and ignore the rest. In this case, you will see the purchase event tag firing in GTM and GTM will send out transaction details to GA4. But there will be no event / ecommerce record of it in the reports.
If you need a quick solution to make transaction_id values unique, consider appending UNIX datetime values to the original transaction_id.
We hope this tutorial helped you resolve a particular problem. For more tutorials and our free training courses, check out our Academy section. As always, we would love to hear from you! If you think that there is an error in our tutorial, or if you have a better way to solve this issue, please do let us know. We’ll share it with our entire community.
About the author(s):
Jingfei is our software engineer. She can magically convert our craziest ideas into well-optimized chunks of code. Her unbounded energy and can-do attitude keep our technical teams running like a well-oiled machine. We suspect that the source of her energy is the classics: she loves opera, her favorite composer is Mozart and in another life, she could have easily been an archeologist. She lives in Montreal, Canada.